Both the square hole bottom bracket and the splined bottom bracket can be disassembled and reassembled in a manner that is almost identical to the other. The first thing that needs to be done is to take apart the chainring. Teeth with a tooth plate.
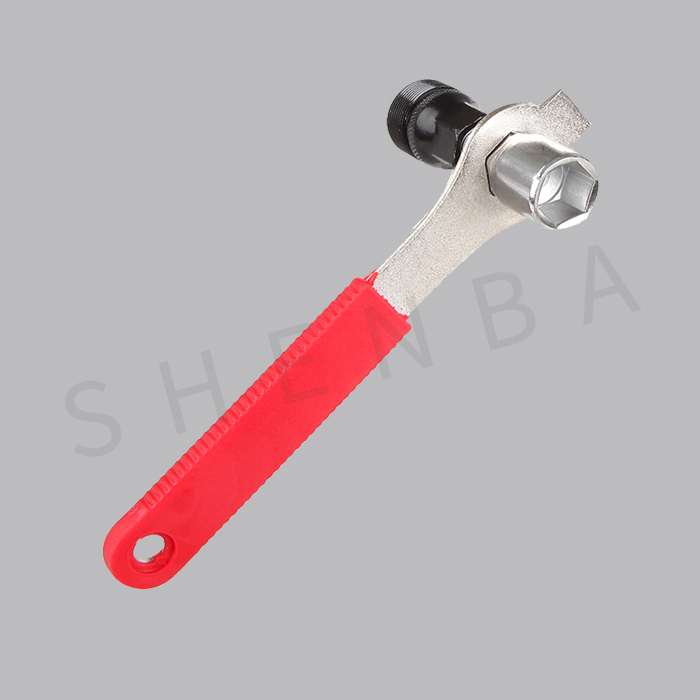
Remove the crankset fixing screw counterclockwise with a crank removal wrench, screw the bike crank remover tool into the crank screw hole, hold the crank while rotating the handle of the crank removal tool clockwise (if there is no handle, use a wrench instead), and then allow the removal tool shaft to rotate freely. While the crank is being loosened by pressing the bottom bracket, remove the chainring by pulling it downwards. At this juncture, you should steer clear of the chain that is pulling the front derailleur.
Be very careful not to damage the crankset or the crank threads as you remove the other side of the crank. This can be easily done if you don’t pay attention. When removing a British-threaded bottom bracket, the left and right threads on the left and right sides of the bottom bracket must be reversed, and the thread on the left side of the bottom bracket must be the forward thread. The forward threads on the left and right sides of the Italian threaded bottom bracket need to be loosened clockwise, while the reverse thread on the right side of the shaft needs to be loosened counterclockwise. The reverse thread on the right side of the shaft should be loosened clockwise.
When disassembling, start by taking off the one on the left. When you are disassembling it, first unscrew it and then leave it in place; do not remove it entirely. Turn the screw on the right side counterclockwise to unscrew it, and then remove it simultaneously from both sides. During the installation process, it is essential to distinguish between the left and right sides. In most cases, the right side corresponds to the larger central axis body, and the right side corresponds to the larger. The one on the left is the smaller of the two. Applying lubricant to the thread diagram of the central shaft will make the operation simpler and will make it less likely that the thread will become damaged.
When installing, start by putting the right center shaft in place, then turn it counterclockwise to tighten it. After that, put the left side in place, use the crank removal wrench to screw the right side to the center shaft and the plane of the bottom bracket, and then tighten the left side. After that, hang the chain on the position of the bottom bracket to prevent leakage, and then put the chainring back on the bottom bracket.
When exactly should the axle’s center be maintained, then? In most cases, the central axis determines that the abnormal noise resistance is excessively high, and as a result, the central axis must be preserved. The maintenance of this device typically entails adding butter and cleaning any internal bearings or balls that may be present. In the event that the bearing balls or any other rolling components have become When the wear and tear is significant, you should replace it.
Before performing any maintenance, first carefully remove the bearing from the central shaft of the bike using the bike crank puller, and then use a sharp taper to carefully lift the dust cover from the bearing. Take care not to scratch or otherwise damage the dust cover. In the event that the only thing missing is butter, you are free to incorporate it right away. In the event that impurities are discovered, either kerosene or gasoline can be used to clean it. If the inner and outer rings of the bearing are found to be wobbly, this indicates that the bearing has reached the end of its useful life and needs to be replaced.
Post time: Dec-19-2022